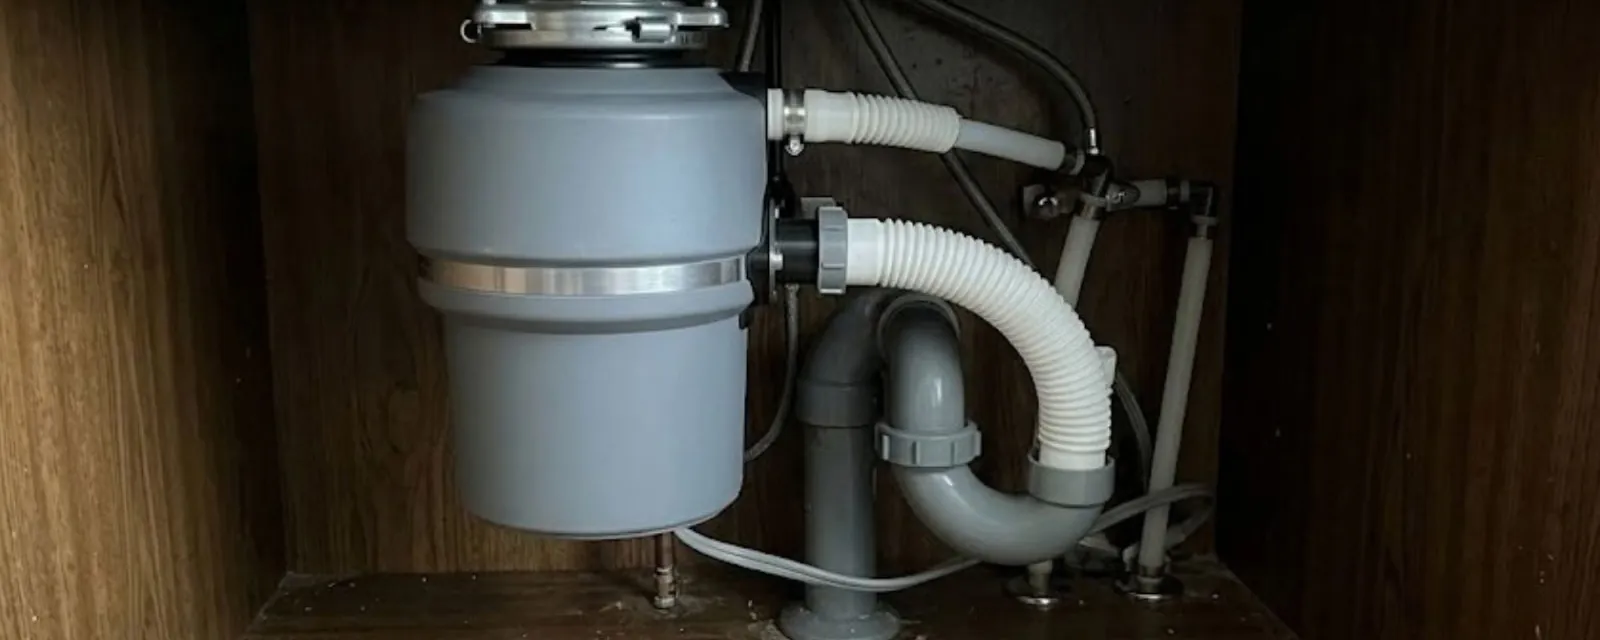
A garbage disposal installation replaces or adds a motorized grinder under the kitchen sink, and the job has four parts: removing the old unit or the sink drain flange, mounting the new one, connecting the drain and dishwasher line, and wiring it to power.
A competent DIYer can finish a straight swap in a couple of hours. A first-time install, a new circuit or a drain that has to be reworked is a job for a licensed plumber.
Most trouble comes from small things: a missed dishwasher knockout, an overtightened flange, a cord run through the wrong place. The sections that follow lay out what to buy, how the work flows and which steps carry real risk.
Which type of disposal fits your kitchen
Choose by how you cook and how much room sits under the sink. A larger motor handles more, but it also takes more space and costs more.
| Type | Best for | Watch out for |
|---|---|---|
| Continuous feed | Most households, with a wall switch | Never run it without water, and keep hands and utensils out |
| Batch feed | Homes with young children | Needs the stopper in place to start, so cleanup is slower |
| Basic motor | One or two people with light use | Slows down with fibrous waste and bones |
| Higher horsepower motor | Large families and frequent cooking | Bigger body may not fit a shallow cabinet |
| Quiet models with sound insulation | Open-plan kitchens | Higher price and a taller housing |
How the installation works
These are the stages a plumber follows. If any of them feels unfamiliar, that is a good reason to hand the job over.
Cut power and clear the cabinet
Turn off the breaker for the sink circuit, then unplug or unwire the old unit. Empty the cabinet and put a bucket under the trap.
Remove the old unit and the mounting ring
Release the mounting ring, lower the disposal, and take off the flange from the sink opening. Scrape off old plumber's putty.
Set the new flange and mount
Press a ring of fresh putty under the flange, seat it in the sink and tighten the mounting assembly until the unit hangs level.
Connect drain and dishwasher
Attach the discharge elbow to the trap. If a dishwasher connects, knock out the plug inside the dishwasher inlet and clamp the hose.
Wire, test and check for leaks
Connect the cord or hardwire the unit to a safe, grounded source, then restore power. Run water for a minute and check every joint.
If you are adding a disposal where none existed, the sink may need a wider drain opening, a new switch location and a receptacle under the sink. That is part of broader plumbing installation and often needs an electrician or a licensed plumber to coordinate.
Want a disposal installed correctly the first time?
Call (773) 207-0518 and a licensed plumber will confirm the fit, wiring and drain before work starts, with a clear price up front.
The dishwasher knockout plug
New disposals come with a small plastic plug sealed inside the dishwasher inlet. If it stays in, the dishwasher cannot drain, and water pools in the bottom of the dishwasher after every cycle. Remove it with a screwdriver and a light tap, then fish the loose piece out of the chamber so it does not jam the grinder.
Before you buy: five checks
A short check of the sink and cabinet prevents the most common mistakes.
- Measure cabinet depth and trap height. Some disposals need more room than the unit they replace.
- Check the sink opening. Most stainless and cast iron sinks take a standard flange, but some thin or composite sinks need a special mounting kit.
- Confirm power. You need a nearby grounded receptacle or a safe way to wire it, plus a wall switch for continuous feed units.
- Look at your drain line. A slow or corroded trap is a poor foundation for a new disposal and may need to be replaced first.
- Think about the drain line past the trap. A disposal sends more solids down the pipe, so a line that already runs slow will clog sooner and heavy grease still builds up.
DIY or professional: where to draw the line
A like-for-like swap with an existing outlet, a standard sink opening and a dishwasher hose already in place is the easiest case. Taking photos of the old wiring and connections before you start helps. Skip the DIY route if there is no electrical supply under the sink, the drain pipe is old or crooked, or the unit has to be hardwired.
A plumber also checks the discharge line for slope and trap fit, tests for leaks under load and makes sure the dishwasher drains. If the old unit failed because of a jam or a leaking seal, our garbage disposal repair team can often tell you whether repair or replacement makes more sense.
Habits that keep a new disposal working
A disposal is not a trash can. A few simple habits double its useful life.
Run cold water
Cold water keeps fats solid so they break up and flush, rather than coating the pipe.
Feed it in small amounts
A steady trickle of scraps works better than a pile dumped at once.
Skip the hard and stringy
Bones, fruit pits, celery strings and potato peels in bulk cause jams and clogs.
Keep grease out
Cooking oil and fat belong in a can. They harden downstream and block the line past the trap.
If a disposal that is installed correctly still leaves the sink draining slowly, the blockage is likely past the trap. A visit for drain cleaning clears it without damaging the new unit.
Blue Island, IL: what local homeowners should know
About 64.7% of Blue Island homes were built before 1970, and the median home dates to 1961. Kitchens in those houses often have original sink drains, older traps and limited under-sink outlets. Check the trap and the drain stub behind the cabinet wall before you buy a disposal, because a corroded fitting can fail when you try to remove it.
Blue Island's city code requires a plumbing permit for plumbing installation and repair, applied for through the Building Department by a plumber on the owner's behalf. The code also lets the owner-occupant of a single-family home apply for himself or herself. Because a disposal swap may or may not fall under that rule, call Building Safety at City Hall to confirm before you start.
Nearly half of local homes are rented: renter-occupied units make up 48.2% of the 8,464 occupied homes. If you rent, check your lease and ask the landlord before you install or replace anything under the sink. We also serve Alsip and Riverdale, where the same planning questions apply to homeowners and landlords.
Questions homeowners ask
A straight replacement usually takes one to two hours. A first-time install that needs a new switch, outlet or drain changes takes longer.
Most standard kitchen sinks accept one, but some thin or composite sinks need a special mounting kit. A plumber can check the opening before you buy.
If there is a grounded outlet under the sink and a switch on the wall, a plumber can plug the unit in. Adding either one is electrical work.
The knockout plug in the dishwasher inlet is probably still in place. Remove it and clear the loose piece from the chamber.
The city code requires a permit for plumbing installation and repair, with an exception for an owner-occupant of a single-family home. Call Building Safety to confirm how it applies to your install.
Ask your landlord first. The owner is responsible for the building plumbing, and a licensed plumber can do the work with the owner's approval.